Last Updated: 11/6/2024
WARNING: This content is still being edited. Please review carefully before use.
We are going to use this page to review part of the a file system. In this example we are going to work with an Ubuntu
root@resize:/etc# lsblk
NAME                      MAJ:MIN RM  SIZE RO TYPE MOUNTPOINTS
sda                         8:0    0   16G  0 disk
├─sda1                      8:1    0    1M  0 part
├─sda2                      8:2    0  1.8G  0 part /boot
└─sda3                      8:3    0 14.2G  0 part
  └─ubuntu--vg-ubuntu--lv 252:0    0   10G  0 lvm  /
sr0                        11:0    1 1024M  0 rom
One question might be…. how can I tell if my disk system is using either the GPT or MBR partitioning scheme.
root@resize:/etc# parted -l
Model: VMware Virtual disk (scsi)
Disk /dev/sda: 17.2GB
Sector size (logical/physical): 512B/512B
Partition Table: gpt
Disk Flags:

Number  Start   End     Size    File system  Name  Flags
 1      1049kB  2097kB  1049kB                     bios_grub
 2      2097kB  1881MB  1879MB  ext4
 3      1881MB  17.2GB  15.3GB


Model: Linux device-mapper (linear) (dm)
Disk /dev/mapper/ubuntu--vg-ubuntu--lv: 10.7GB
Sector size (logical/physical): 512B/512B
Partition Table: loop
Disk Flags:

Number  Start  End     Size    File system  Flags
 1      0.00B  10.7GB  10.7GB  ext4
So in this case we have a SCSI presented disk. We are using VMWare for virtualization. The disk is configured as 16GB. It describes the partition table as GPT: And then we see 3 partitions.
And just to examine the 3rd partition we can use the following which will confirm that this partition is made over for LVM. (in short; instead of being directly used as ext2, ext3, ext4, xfs, etc…. the partition is LVM2 PV which means it is reserved for use by the Logical Volume Manager)
root@resize:/home/ubuntu# file -sL /dev/sda3
/dev/sda3: LVM2 PV (Linux Logical Volume Manager), UUID: 6ZQt8m-r4AN-CI39-FK59-5nMs-83GH-NPljaH, size: 15297675264
CHANGE THE DISK SIZE
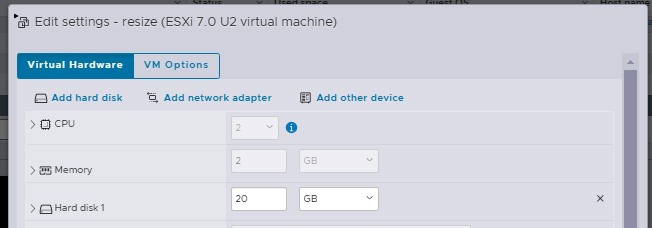
Let’s say we resize the disk from 16 to 20 GB in VMWare.

The following 2 lines might be needed in order to encourage the OS to recognize the change
rescan-scsi-bus.sh --nosync -f -a -r -m
And
rescan-scsi-bus.sh -aIf I am being honest the above can be a little hit or miss. Some times a rescan works.
echo 1 > /sys/block/sda/device/rescanNow the above can be done without restarting the VM. If all else fails, I would restart the VM and see what that does for you.
Now when we check we should now see 20GB of space. (sda device)
root@resize:/etc# lsblk
NAME                      MAJ:MIN RM  SIZE RO TYPE MOUNTPOINTS
sda                         8:0    0   20G  0 disk
├─sda1                      8:1    0    1M  0 part
├─sda2                      8:2    0  1.8G  0 part /boot
└─sda3                      8:3    0 14.2G  0 part
  └─ubuntu--vg-ubuntu--lv 252:0    0   10G  0 lvm  /
sr0                        11:0    1 1024M  0 rom
EXTENDING THE VOLUME
We can use the growpart command.
STEP 1:
root@resize:/home/ubuntu# growpart /dev/sda 3
CHANGED: partition=3 start=3674112 old: size=29878272 end=33552383 new: size=38268895 end=41943006 root@resize:/home/ubuntu#
In short LVM2_VM partition now has additional space. When we look we now see that “sda3” has 18.2G (not the 14.2G we had before)
root@resize:/home/ubuntu# lsblk
NAME                      MAJ:MIN RM  SIZE RO TYPE MOUNTPOINTS
sda                         8:0    0   20G  0 disk
├─sda1                      8:1    0    1M  0 part
├─sda2                      8:2    0  1.8G  0 part /boot
└─sda3                      8:3    0 18.2G  0 part
  └─ubuntu--vg-ubuntu--lv 252:0    0 14.2G  0 lvm  /
sr0                        11:0    1 1024M  0 rom
Given that we can ask a question with PVS it will now confirm that their is 4.00G under PFree
root@resize:/home/ubuntu# pvs
  PV         VG        Fmt  Attr PSize   PFree
  /dev/sda3  ubuntu-vg lvm2 a--  <18.25g 4.00g
The question then becomes how can I add the 4 extra Gigs of space to the volume that has the Volume Group:ubuntu-vg and the Logical volume: ubuntu-lv
STEP 2
Now that we have made room we will grow the logical partition.
root@resize:/home/ubuntu# lvextend -l +100%FREE /dev/ubuntu-vg/ubuntu-lv
  Size of logical volume ubuntu-vg/ubuntu-lv changed from <14.25 GiB (3647 extents) to <18.25 GiB (4671 extents).
  Logical volume ubuntu-vg/ubuntu-lv successfully resized.
And now, by design, we have a 18.2G partition for root.
root@resize:/home/ubuntu# lsblk
NAME                      MAJ:MIN RM  SIZE RO TYPE MOUNTPOINTS
sda                         8:0    0   20G  0 disk
├─sda1                      8:1    0    1M  0 part
├─sda2                      8:2    0  1.8G  0 part /boot
└─sda3                      8:3    0 18.2G  0 part
  └─ubuntu--vg-ubuntu--lv 252:0    0 18.2G  0 lvm  /
sr0                        11:0    1 1024M  0 rom
COMPLICATIONS
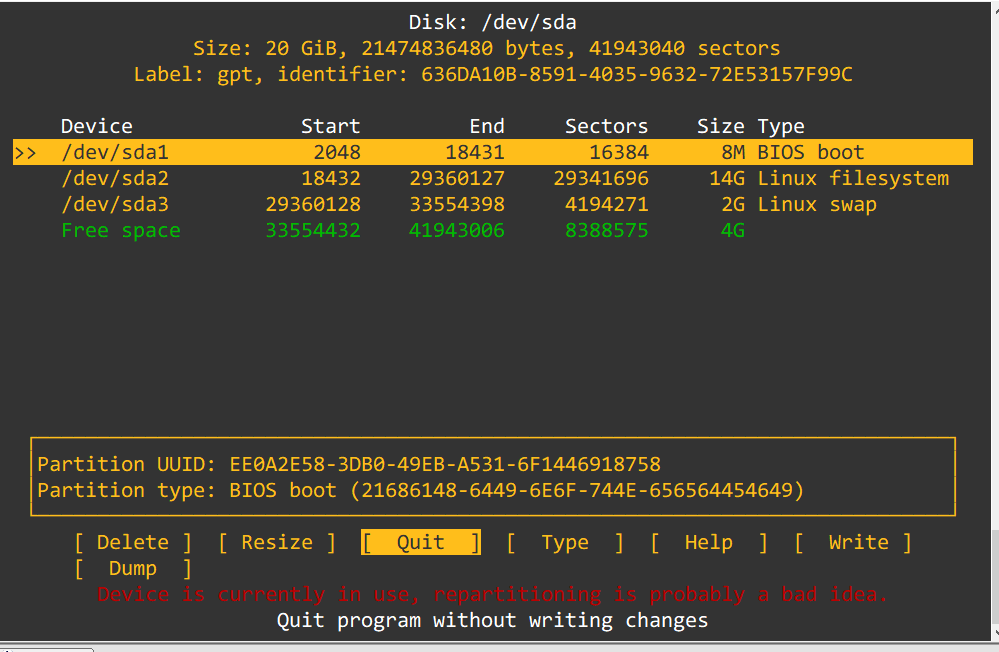
Alternatively, if you are on SUSE and haven’t install “growpart” you can use the interactive tool cfdisk to add the space from your BLOCK DEVICE to your partition.
This is as simple as selecting a target partition (say sda2) and then choosing the resize option.

Please note this may make you scream. I chose (not really) the above example which illustrates the complexities in life. In the above example you will note that the last partition is the swap partition. You can quite easily add the 4G to the 2G.
However adding the 4G to the 14G root file system can’t be done in a direct manner.
Even if you had “growpart” available it would have said the following
localhost:/tmp/rpm # growpart /dev/sda 2
NOCHANGE: partition 2 is size 29341696. it cannot be grown
References:
https://serverfault.com/questions/509468/how-to-extend-an-ext4-partition-and-filesystem

